 I really love this tea cozy! I was recently asked to host a table for a women's tea and decorating was the best part. I am a bit obsessive with things and want everything to be just right. So of course my teapot needed new duds!
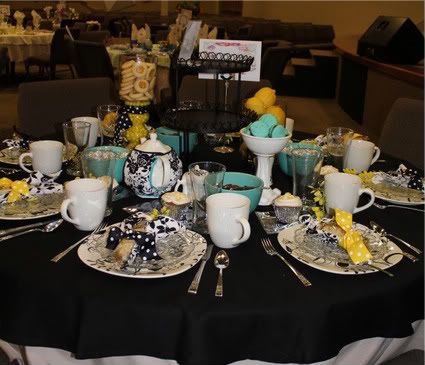 So here goes the tutorial! She is very easy to put together, just follow the pics if you need some guidance. Please note that the pattern is for a standard round teapot. If your teapot is shaped different, I would first adjust the pattern pieces to fit your hot lady! You can legnthen, widen, and adjust the openings easily.
Materials: 1 fat quarter or (1/4 yd) fabric, 1/4 yd thin insulated batting (cotton batting will work too), 1 1/2 yd piping, 2 yds bias tape (handmade or store purchased), one large button, 1/4" elastic, and thread to match.
1) Start by printing out the tea cozy pattern. DOWNLOAD ME!
2) Once you have printed it out, cut out the pattern pieces and tape to one side of your teapot. This is the time to make any adjustments. Remember that there are 1/2" seam allowances, so you don't want it skin tight! If you need to add, just tape a piece of fabric to the back and add where needed until it fits. If it is too big, just take it in a little bit.
3) Once you have a working pattern, cut out all of your pieces. You should have two of each pattern piece for fabric, batting, lining *(optional) Transfer markings.
4) Start by sandwiching your fabric together. Fabric, batting, lining (do this for each piece. If you would like, you can baste them together around the edges.
5) Stitch front to front at bottom and back to back at the bottom.
 6) Attach bias trim to rounded inner edges. On the front piece, continue up to the top edge.
  7) Attach elastic from mark to mark on both front and back. Pull the elastic a bit as you are attaching. Use zigzag stitch to attach. The elastic won't be visible from the front.
 8) Attach the front to back at the side seams. If you like, you can sandwich piping in the seams!
 9) Stitch together back pieces at top edge. You will now have a completed handle opening.
10) Attach piping around entire top edge. You may need to trim down your seam allowances prior to doing this to avoid bulk. When you get to the end, open up the piping, pull the fabric back and trim the cord so that it is flush with the edge. Then fold the back into itself . Top stitch top edge.
 11) Attach bias trim to bottom edge. Stitch elastic to inside just as before, using a zigzag stitch.
 12) Put your cozy on your teapot. Fold one front piece over the other until it has a nice fit. Pin and mark where your button will go. On one side create a button hole to fit your button and on the other side attach the button.
 13) Put her on your hot lady and you are ready for one heck of a tea party!!


2 comments:
Thank you so much for th etea cozy pattern!!! Most people do not know what this is. I have been looking for them and now with this pattern I can make my own!
Hi, I have featured this lovely idea in a blog post called 20 ways with piping. Please check it out if you’d like.
http://sewandthecity.blogspot.com/2011/09/twenty-ways-with-piping.html
Best regards
Irina
Post a Comment