Thursday, March 1, 2007
Tuesday, February 27, 2007
Lemon Lime Sock Yarn

Ok, so the sock bug has me in it's grip! I decided to dye my own yarn so that I could get exactly what I want. This is one of the skeins that I dyed with a lemon lime colorway. It is self striping and is now knitting up nicely. I will post pics of the final product when I am finished. The base yarn is a cotton fleece (80% cotton 20%wool) by Lambs Pride. It is dyed with procion mx. These will be perfect for the summertime!
Monday, February 26, 2007
Sweater Pin How To
Materials:
Natural Colored Polymer Clay
Heavy Gauge Metal Wire
Adirondac Alcohol Inks (colors of your choice)
Adirondac Alcohol Blending Solution
Paper towels
Extra fine sandpaper
Satin Varnish (non yellowing)
For both pieces:
Form metal wire into desired shape and sandwich between two sheets of polymer clay that has been rolled out into about 1/8"thickness. *One will be round with a hole in the center and the other is just a stick!
Using an x-acto knife, cut edges into desired abstract shape. Press and mold until the pieces look organic.
Bake according to manufacturers instructions.
When it has cooled completely, sand until smooth and wipe clean with a damp cloth.
Coloring:
This is the tricky, but fun part! Using three different colors of alcohol inks, decorate the items. I start with the lightest color and layer until I like the way it looks. I use paper towels to rub color in, blot, and apply color. The blending medium gives you the look of small diffused circles. Use sparingly as it causes the ink to disperse in the area it is applied. If you want some defined lines, apply ink to an area, allow it to set and dry slightly and then burnish it off.
LAYER LAYER LAYER! The more you layer, the prettier it is.
Once you get the look you like, let it dry for a few hours and coat with 2 layers of satin varnish.
Tuesday, February 13, 2007
Delainee's Pink Hat
My niece was visiting this weekend and I couldn't resist making her something to take home. I hooked this hat for her, without a pattern, in about 2 hours. It is made of baby chenille and is so soft and sweet. She loves it and insisted on wearing it to bed. She asked me if I was making her socks, so there is another thing to add to my to do list. They are not nearly as quick as this little hat, but I will get them done.Because I didn't use a pattern and no longer have the hat, I don't really have a pattern to post, but I can tell you that it is just a simple combination of hdc and fpdc. I had 5 fpdc going around the hat and increased between them until it was the right diameter and then did a few rows without increases and actually decreased a few stitches in the front where the brim would go so that it would fit her head nicely. I then tripled my yarn for the brim and placed it so that it would be centered across her forehead. She was here so I just tried it on her until I figured it out. It only took three rows of hdc, using two chains and decreasing by two on the edge to make it look right.
As you can surely tell, I am not a hooker, but a knitter, so this description is a bit out of wack. If you have questions, just email me and I will see if I can clarify.
Sunday, February 11, 2007
AND THE WINNER IS!
I must admit, I had no idea that so many wonderful submissions would be made. Your stories made me laugh and cry. It is so cool that such a simple thing as knitting has made a mark on so many lives. After much agonizing, I finally threw my top names into a hat and picked a winner. And the winner is............

Paddlespinner

Paddlespinner
Please email me your shipping information and I will get these out to you this week. Thanks again to everyone who participated. I will try to do a contest of some sort every few months, so check back often. I think that the next one will be something fun and goofy!
Saturday, February 10, 2007
I am at it again! Handmade knitting needles
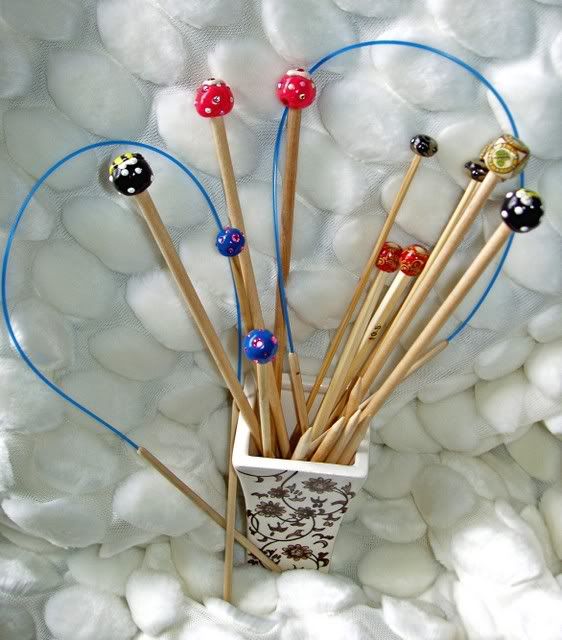
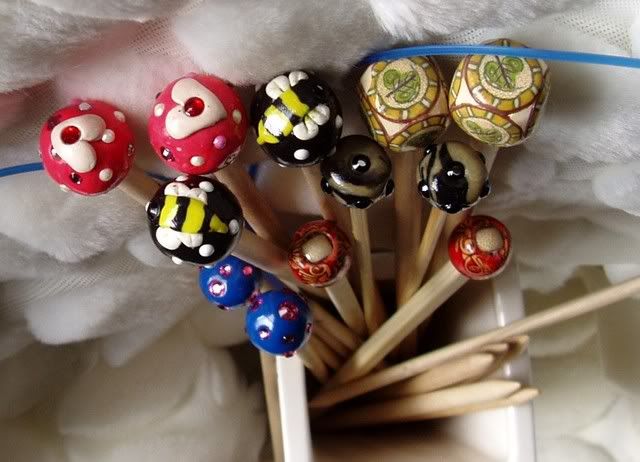
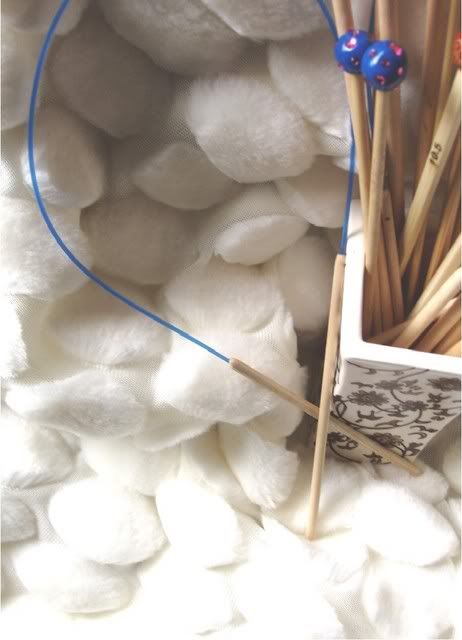
I really need to stop adding projects to my list of to do's! I think I am driving my DH batty. Here are some of the handmade knitting needles that I am making. Most are made with dowels, some bamboo skewers and one set of chopsticks. I use beads, polimer clay (I varnish these so that they are shiny!), swarovski crystals and anything that I find for the ends. My favs are the circular needles! I am so proud of myself! The how to's for the circs are after the pics. Have fun and send me pictures of the ones that you make!


Circular needle how to:
These are simple, but be patient. First choose your dowel size and cut them to the legnth you desire. The sharpen only one end of each dowel. On the flat side, use a 1/16 drill bit and and drill a hole right in the center about 1/4" into the dowel. I then begin sanding down the dowel. It takes a few minutes of sanding, but getting it nice and smooth is vital. Be sure to round out and taper the end with the hole! Once it is smooth (finish with an extra fine grit), rub it with mineral oil and then rub in parafin wax and buff. The rest is a piece of cake. Cut a legnth of weedwacker line and apply a dab of E6000 to the end, insert into the hole firmly. Repeat for the other end of the line. Allow these to dry for a few hours before you use them!
If you are going to make tiny circs, just use a smaller drill bit and a plastic coated wire using the same instructions as above. The little ones require a very steady hand and I recommend using bamboo skewers instead of dowels.
What TOTALLY ROCKS about this project is that the weedwacker line comes in so many colors that you can use a different color to denote the needle size! Secondly, they only cost about 20 cents per pair! More money for the yarn stash!
Circular needle how to:
These are simple, but be patient. First choose your dowel size and cut them to the legnth you desire. The sharpen only one end of each dowel. On the flat side, use a 1/16 drill bit and and drill a hole right in the center about 1/4" into the dowel. I then begin sanding down the dowel. It takes a few minutes of sanding, but getting it nice and smooth is vital. Be sure to round out and taper the end with the hole! Once it is smooth (finish with an extra fine grit), rub it with mineral oil and then rub in parafin wax and buff. The rest is a piece of cake. Cut a legnth of weedwacker line and apply a dab of E6000 to the end, insert into the hole firmly. Repeat for the other end of the line. Allow these to dry for a few hours before you use them!
If you are going to make tiny circs, just use a smaller drill bit and a plastic coated wire using the same instructions as above. The little ones require a very steady hand and I recommend using bamboo skewers instead of dowels.
What TOTALLY ROCKS about this project is that the weedwacker line comes in so many colors that you can use a different color to denote the needle size! Secondly, they only cost about 20 cents per pair! More money for the yarn stash!
FYI You can use metal stamps from Harbor Freight to impress the needle with the size if you like. (these are so cheap and I use them on all sorts of things!)
Tuesday, February 6, 2007
I LOVE IT!!!
Subscribe to:
Posts (Atom)