Wednesday, May 19, 2010

Tea Cozy Tutorial

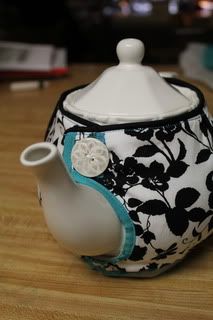
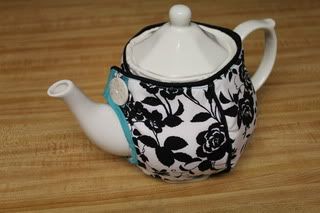
I really love this tea cozy! I was recently asked to host a table for a women's tea and decorating was the best part. I am a bit obsessive with things and want everything to be just right. So of course my teapot needed new duds!

So here goes the tutorial! She is very easy to put together, just follow the pics if you need some guidance. Please note that the pattern is for a standard round teapot. If your teapot is shaped different, I would first adjust the pattern pieces to fit your hot lady! You can legnthen, widen, and adjust the openings easily.


Materials: 1 fat quarter or (1/4 yd) fabric, 1/4 yd thin insulated batting (cotton batting will work too), 1 1/2 yd piping, 2 yds bias tape (handmade or store purchased), one large button, 1/4" elastic, and thread to match.
1) Start by printing out the tea cozy pattern. DOWNLOAD ME!
2) Once you have printed it out, cut out the pattern pieces and tape to one side of your teapot. This is the time to make any adjustments. Remember that there are 1/2" seam allowances, so you don't want it skin tight! If you need to add, just tape a piece of fabric to the back and add where needed until it fits. If it is too big, just take it in a little bit.
3) Once you have a working pattern, cut out all of your pieces. You should have two of each pattern piece for fabric, batting, lining *(optional) Transfer markings.
4) Start by sandwiching your fabric together. Fabric, batting, lining (do this for each piece. If you would like, you can baste them together around the edges.
5) Stitch front to front at bottom and back to back at the bottom.
6) Attach bias trim to rounded inner edges. On the front piece, continue up to the top edge. 7) Attach elastic from mark to mark on both front and back. Pull the elastic a bit as you are attaching. Use zigzag stitch to attach. The elastic won't be visible from the front.
8) Attach the front to back at the side seams. If you like, you can sandwich piping in the seams!
9) Stitch together back pieces at top edge. You will now have a completed handle opening.
10) Attach piping around entire top edge. You may need to trim down your seam allowances prior to doing this to avoid bulk. When you get to the end, open up the piping, pull the fabric back and trim the cord so that it is flush with the edge. Then fold the back into itself . Top stitch top edge.
11) Attach bias trim to bottom edge. Stitch elastic to inside just as before, using a zigzag stitch.
12) Put your cozy on your teapot. Fold one front piece over the other until it has a nice fit. Pin and mark where your button will go. On one side create a button hole to fit your button and on the other side attach the button.
13) Put her on your hot lady and you are ready for one heck of a tea party!!

Wednesday, May 12, 2010

Topsy Turvey Dolls

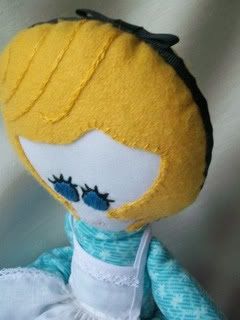
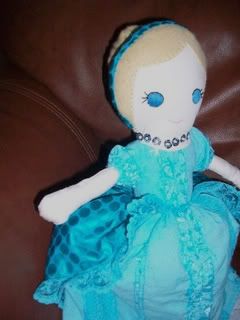
I am going through a time of reminicing. Maybe it is because my kiddos are getting older, but all I know is that I have spent a lot of time remembering the way things were when I was young. One memory of my childhood was my topsy-turvey doll. I played with it until it literally fell to pieces. It was little red riding hood, grandma, and the big bad wolf. Oh how I LOVED that doll. So, when I was chatting with Madyrose about the doll, she looked at me, puzzled. Then requested that I make her one so she could see for herself. I started with Alice and the Queen of Hearts, then Cinderella. I am not sure what doll will be next, but I LOVE making them.
My boys have an interesting teenage take. One thinks that it might influence little ones to look up people's skirts. I didn't think about that, but the other son's suggestion to make a doll giving birth is NOT going to happen. Oui Ve! Love my boys!!
The patterns are almost complete and will be on Etsy when all is said and done! Each pattern will be a different character combination, but with some minor tweeks, you could make it into anything that you like.

Getting Cozy!


I am getting ready for a ladies tea and thought "what would be better than a custom cozy?" I will be doing a tutorial for this soon, but couldn't wait to post the pictures. Is she cute or what???


Wednesday, January 14, 2009

ORIGAMI HOODIE Pattern and Tutorial- FREE


So here is the long awaited pattern and tutorial for the Origami Hoodie that I designed. This pattern is in the testing phase, so if you have any questions or suggestions, please let me know. I hope that you LOVE it!!
Download both the pattern and the instructions on the side tab bar. Please note that this pattern is the intellectual property of My Creative Eye and Shelly Houseman. It may not be reproduced and sold. This pattern is for personal use only and may not be used to make items to sell.


Thursday, January 8, 2009

Digi Day

This has been an eclectic creative week. Not really by choice, but it is nice to have a little change here and there. I was hired to design a logo for an organization called The Bridge and have not been motivated, but got it finished and approved this week. Over the years I have designed lots of logos. The nice part is that it is a pretty quick process, as far as graphic design goes, and gets your work circulated all over the place! It is not quite as flashy as the mural work, but fun nonetheless. So here is the latest and the greatest!


For your viewing pleasure, here are a couple of others that I have done:


Wednesday, January 7, 2009

Hot Stuff


I have been a bit obsessed with fused glass of late.  In the last month and 1/2 I have pumped out 30+ of the hot little puppies.  Each one is different because, as you know, I get bored quickly!   Each cab takes 9+hours from start to finish, including the kiln time.  So I am not running a sweatshop, but it is still time consuming.  I actually taught my art students the process and they made them as Christmas gifts.  It was quite a hit and much better than the coil pot ashtray that I gave my non-smoking mom back in the 80's!  If there is enough interest, I will post a tutorial, just comment and let me know!  The only kicker is that you need a kiln :\!

 I currently have these for sale in my Etsy Shop and local locations here in the Monterey Bay area.  I hope that you love'm like I do.  

Tuesday, January 6, 2009

A New Year is Here!

So, I have to be one of the worst bloggers of all time! Seriously, if I post once a month, I am on a roll. My goal for this year is to update much more often and hopefully twice a week at least. It sounds like a possibility, right? Well, I will give it a shot!

Yesterday was the first day back from Christmas break. Two of my three kiddos thought that it would be a wonderful time to be "sick." What this really means is that they were to lazy to get ready for school and thought that it would be much more fun to torture mom all day and then send her to her portable rubber room with a bottle of wine and a screaming headache! Thanks to my wonderful husband, the torture was averted. We have this no fever, no barf, or no green, then get your butt to school rule. It works well for him, I haven't had the same luck. When Connor was in 1st grade, I sent him to school when he cried sick. There was no fever, barf, or green, that is until he got to school and puked all over his desk (a table that he shared with 3 other kids) and the floor too! We aren't talking about a little bit either. The class had to be evacuated for 24 hours, I had to replace school supplies for Connor and his table buddies and there was also the fact that when it happened I didn't have my cell phone on. This meant that to locate me, the school had to notify everyone on my emergency list. This included family, extended family, neighbors, and friends! Talk about torture! There is nothing worse than your mother finding out that you sent their grandchild to school only to have them vomit everywhere! Needless to say, my hubby is now in charge of the NFNBNG Law. He is pretty good at it too. Sometimes I wonder if he is a secret CIA interrogator. He can sense a faker from a mile away. And yes...they were both big fat fakers!